Table Mat Decoration DIY: Turn Ordinary Table Mats into Unique Pieces with Stickers/Paint (Perfect for Kids' Rooms/Studios)
25 Nov 2025
0 comments
An ordinary table mat—whether it’s a plain PVC one from the store or an old cotton-linen piece—holds endless creative potential. With a few stickers, some paint, and a little imagination, you can transform it into a one-of-a-kind decor item that fits perfectly in your kid’s playroom or your creative studio. Best of all, this DIY is budget-friendly, mess-controllable, and fun for both kids and adults. Let’s dive into three easy projects, plus pro tips to make your creation last.
First, let’s talk about why table mat DIY is such a great idea: It’s customizable (match any color scheme!), kid-safe (use non-toxic supplies), and practical (decor that doubles as a functional table protector). We’ll focus on PVC and cotton-linen mats—they’re durable, easy to work with, and ideal for both messy kids’ activities and daily studio use.
Project 1: Sticker Bomb Table Mat (Kid-Friendly & 15-Minute Finish)
This project is perfect for little hands (ages 3+) and anyone who loves vibrant, playful designs. Stickers are mess-free, and kids can take full creative control—no artistic skills required!
What You’ll Need
-
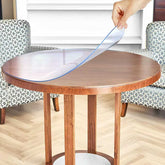
1 plain PVC table mat (transparent or light-colored works best—white, beige, or pastels)
-
Assorted stickers (waterproof is key! Look for vinyl stickers, cartoon characters, alphabet letters, or geometric shapes)
-
A clean, flat surface (kitchen counter or floor with a towel underneath)
-
Tweezers (optional, for small stickers—helps kids place them neatly)
-
A dry cloth (to wipe the mat before starting)
Step-by-Step Guide
-
Prep the Mat: Wipe the PVC mat with a dry cloth to remove dust or fingerprints. Make sure it’s completely dry—stickers won’t adhere well to damp surfaces.
-
Plan the Design (Optional): For a cohesive look, lay out the stickers on the mat (without peeling them) to test the arrangement. Kids can skip this step and go free-style—chaotic designs are part of the fun!
-
Stick Away: Peel the stickers one by one and press them firmly onto the mat. For small stickers, use tweezers to avoid smudging. Press each sticker down for 5 seconds to ensure it sticks—pay extra attention to the edges.
-
Seal (Optional): If the mat will be used for messy activities (like art or snack time), spray a thin layer of clear acrylic sealer (water-based, non-toxic) over the stickers. Let it dry for 1 hour before use. This prevents stickers from peeling off.
Pro Tip for Kids’ Rooms:
Use alphabet stickers to spell your child’s name in the center, then let them fill the rest with their favorite cartoon characters. The waterproof PVC mat is easy to wipe clean—perfect for juice spills or crayon marks!
Project 2: Hand-Painted Table Mat (For Studios & Adult Spaces)
If you’re looking for a more sophisticated, personalized piece for your studio or home office, hand-painting a table mat is the way to go. Acrylic paint works great on both PVC and cotton-linen mats, and you can create anything from minimalist patterns to bold abstract designs.
What You’ll Need
-
1 plain table mat (PVC or cotton-linen—cotton-linen absorbs paint better; PVC requires acrylic paint with a primer)
-
Acrylic paint (water-based, non-toxic; choose 3-5 coordinating colors)
-
Paintbrushes (different sizes: small for details, large for backgrounds)
-
Painter’s tape (for clean lines)
-
A pencil and eraser (for sketching designs)
-
A palette or paper plate (for mixing paint)
-
Water cup (for cleaning brushes)
-
Acrylic primer (only for PVC mats—helps paint adhere)
Step-by-Step Guide
-
Prep the Mat: For PVC mats, apply a thin layer of acrylic primer and let it dry for 2 hours (follow the primer’s instructions). For cotton-linen mats, wash and dry it first to remove any sizing—this helps paint stick better.
-
Sketch the Design: Lightly draw your design on the mat with a pencil. Keep it simple if you’re a beginner—stripes, polka dots, or geometric shapes work great. For studios, try adding your favorite quotes or small symbols (like a paintbrush or laptop).
-
Use Painter’s Tape (If Needed): For clean lines (e.g., stripes or chevron patterns), apply painter’s tape to the mat. Press the edges firmly to prevent paint from seeping under.
-
Start Painting: Begin with the background color (if using) and let it dry completely (1-2 hours) before adding details. Use thin layers of paint—thick layers can crack when the mat is rolled or folded. For PVC mats, avoid painting the edges (they may peel).
-
Add Details: Once the background is dry, use a small brush to add details like dots, lines, or text. Take your time—small details make the design pop!
-
Seal the Design: Let the paint dry for 24 hours, then apply a clear acrylic sealer (matte or glossy, depending on your preference). For cotton-linen mats, heat-set the paint by placing a dry cloth over it and ironing on low heat for 5 minutes—this makes it washable.
Studio-Inspired Design Idea:
Paint a neutral background (gray or beige) on a large PVC mat, then add thin black lines to create a “grid” pattern (like a design template). Use small pops of color (blue, green, or yellow) to mark “zones” for your laptop, notebook, and paintbrushes. It’s functional and stylish!
Project 3: Mixed Media Table Mat (Combine Stickers & Paint)
For the ultimate personalized piece, mix stickers and paint to create a layered design. This works for both kids’ rooms and studios—let your creativity run wild!
Idea for Kids: Paint a rainbow background on a PVC mat, then add animal stickers and glitter stickers (seal with acrylic sealer to prevent glitter from falling off).
Idea for Studios: Paint a minimalist abstract design (e.g., soft brushstrokes) on a cotton-linen mat, then add small vinyl stickers of motivational quotes or icons (like a coffee cup or plant).
Tips to Make Your DIY Table Mat Last
-
Choose the Right Mat Material: For high-traffic areas (kids’ rooms, busy studios), use PVC mats—they’re more durable and easier to clean. For a softer, more organic look, use cotton-linen mats (best for low-mess spaces).
-
Use Waterproof Supplies: Always opt for waterproof stickers and water-based acrylic paint—this ensures your design won’t fade or peel when the mat gets wet.
-
Clean Carefully: Wipe PVC mats with a damp cloth—avoid scrubbing the design. Machine-wash cotton-linen mats on a gentle cycle (cold water) and hang to dry (tumble drying can damage the paint).
-
Store Properly: Roll DIY mats loosely (don’t fold them) to avoid creasing the design. Store them in a dry closet or bin.
Show Off Your Creation!
DIY table mat decoration is all about having fun and expressing your personality. Whether you’re making a colorful piece for your child’s playroom or a sleek mat for your studio, the result will be a unique item that adds character to your space.
We’d love to see your DIY masterpieces! Tag us on TikTok @[YourShopName] with #TableMatDIY—we’ll feature our favorite designs on our page. And if you’re looking for plain table mats to start your project, check out our collection of PVC and cotton-linen mats—perfect for painting and sticking!


